Bead Bowls!

Standard

Remember these little beads and pegboards?  Lots of fun, right?!  Well, here’s another idea of something creative you can do with them!  Melt them into a little bowl!

Find an oven safe bowl and wipe it down with any sort of cooking oil.  This helps the little beads stick to the sides of the bowls as well as helping the bowl release when you’re all done.  Preheat oven to 300 degrees.

Push beads into a single layer all the way up to the rim of the bowl.

We started ours in the oven at 200 but 30 minutes later the beads still hadn’t changed at all!  So we turned the oven up to 300 (where I would recommend you start).

And then low and behold, 45 minutes after putting them into the oven they began to melt!  So fun, right?!

We let them cool for about 30 minutes once they were melted to our satisfaction.  Once cooled we pulled them away from the ceramic bowl.  It was actually tougher to pull from the sides than expected.  We pulled on the edges and then yanked it up from the bottom and viola!  Look at this cool bowl!

Leah right away tried her bowl out!  She put some grapes in it for a snack.  She thought it was so cool!

We had fun talking about all the things that would and wouldn’t work to put in and do with the bowl.  Yes on jewelry & no on putting into the dishwasher 😉

Then, as all good toys, it found its way to her head!  Leah wore it for quite a while like this and the other way around.  She liked it so much that she decided she just might wear it to school for crazy hat day 🙂

We had a lot of fun.  I think it would be neat to make a pattern but the random beads look great too.  Enjoy!  & share your fun if you end up giving it a try!

Nanny Appreciate Week

Standard

October 18-24 was National Nanny Appreciation Week!  I didn’t really think much of it since I’m working so part time right now.  About a week ago, the mailman delivered this very sweet surprise!  It has blessed and encouraged me so much and I wanted to share 🙂  Partly because I am thankful for and proud of my career as a nanny and partly because it is so rare to receive a hand written note!  Yep- it is a hand written card.  And this is what it says.

Dear Emma,

On behalf of the International Nanny Association Board of Directors, I would like to honor your service as a professional nanny during this National Nanny Recognition Week!  Your career is an important one.  You spend your days with children, impacting their development and enriching their lives and families.  Thank you for all you give and the professional standard that you set in your community.  This week, we honor you!

Sincerely,

Monta Fleming

INA Board Director

I’m telling you, it nearly made me cry.  I have worked for fabulous people and have for the most part been generously thanked for caring for their kids.  So it took me a little while to figure out why it meant so much to me.  I think its because it feels like a Mother’s Day for my Nanny’s Heart.  Every Mother’s Day I have grieved the longing for a child.  This was my Mother’s Day!  Such an unexpected and wonderful gift.  Thank you INA for taking the time write and send this note.  It meant the world to me.

Awesome Crayon Art

Standard

Step 1 - Sort the crayons- 2 64-count boxes of Cra-Z-Art crayons and 4 24-count boxes of Crayola crayons.

Step 2 - Create patterns- It was exciting that we each ended up with such different patterns and concepts!

Step 3 - hot glue crayons onto canvas.

Step 4 - Turn on the hair dryers and watch the magic happen!

It took maybe a minute or two for the crayons to start melting and between 15 and 30 minutes to complete depending on size and design.

LOVE IT!!! I even love the drip marks on the wax paper/sheet under the project 🙂

David's finished product!

My finished project 🙂

Leah's finished project!

David and Leah both used the Cra-Z-Art crayons and I used the Crayola crayons.  During the process we could definitely tell the difference between the two in how they melted and streamed down the canvas.  I think you can tell from the finished products also, but just barely.  I love each of these canvas’ so much!  It was tons of fun and I highly recommend you give it  a try!  I can’t wait to do it again.

Directions Review:

  • Materials:  Canvas, crayons, hot glue gun, craft sheet or something to catch the splatters, hair dryers, extension cord (maybe)  We purchased the canvas’ and crayons.  The total cost of just under $10.00!  We found 2 packs of canvas’ for 40% off at Hobby Lobby and back to school left over crayons on clearance!
  • Sort crayons and create design/pattern
  • Hot glue crayons to canvas
  • Prop up the canvas using craft sheet (or whatever you have).  We also used wax paper underneath our canvas’.
  • Use a hair dryer to heat the crayons and watch them get shiny and then start to melt and drip down the canvas!
  • The wax sets up pretty quickly so you can handle it nearly right away.
  • None of us got messy at all- the crayons melting only splattered in the direction the hair dryer was blowing.

Enjoy!  And as always, PLEASE share if you give it a try!!!

not feeling whole …

Standard

Beware: A Rant

This path of infertility is bumpy, unpredictable, fragile, lonely and long.

If you’ve ever had a real heart to heart with someone deeply wrestling with the reality of never bearing children, you have probably witnessed first hand that this particular curse digs its heels deep into the soul and identity of the infertile woman.  [I have met very few women who somehow seem to escape the pain of this condition, but they are few.]

“I feel betrayed by my body.”
“I’m so angry at my body.”
“I feel like less of a woman.”

Although not for the first time, this weekend was a particularly difficult battle with a different version of the frustration and pain.

“My husband deserves better.”
“I can’t be the reason my husband is never a father.”

Ugh…

Things my husband will never have/do due to my infertility:

  • deal with the stereotypical hot/cold/uncomfortable/food craving/moody wife…a challenge…but running inside joke he will never be a part of.
  • hear his baby’s heart beat and watch it on a monitor at an ultrasound.
  • put his hand on my stomach to feel our baby move
  • go through birthing classes with me
  • hold my hand during delivery
  • be so proud of me for giving him a child
  • be told his child has his eyes or his nose (and know it to be true)
  • so much more

My heart is aching- and truth be told I want to run away.  My husband deserves all of these things and so much more and it devastates me that I am the reason he will never have these moments to cherish.  In exchange he has memories of far too many negative pregnancy tests, tear filled days, anger, fear of the future, deferred hope- in short- pain.

I do not feel whole today.  I do not feel like my marriage is whole today.  I feel empty.  Lost.  Angry.  Sad.

If you have struggled with infertility I imagine that at least some of this pain has touched your life- and that breaks my heart.

If you have not struggled with infertility I would ask you not to say any of the following at any point to anyone not-feeling-whole (or at least not to me.)

“Pregnancy is such a small part of being parents.  Don’t get so hung up on it.”
“How old are you?”  [In 20’s]  “Oh, you have time.  It will happen, just relax.”  [In 30’s] “Oh, have you guys considered adoption?”
“You’re lucky- I hated being pregnant.  You’re not missing much.”

And if one more person tells me that no we’ll get pregnant since we’ve decided to adopt, I might just have to scream the statistics at them!  Less that 3% of couples who pursue adoption after infertility go on to have biological children.  3%!

True to my blogs name, this is a rant.

I’m a ranting.childless.mother.

Infertility is cruel and I hate it.

Miscarriages are devastating and feel malicious.

Hope deferred makes the heart sick.

I’m not whole.

Gelatin Prank

Standard

Michael and I had tons of fun exploring gelatin.  Here’s what I did:

Buy a box of Knox Gelatin at the grocery store (one box has 4 packs in it)

Follow the directions for gelatin using water instead of juice (I made all 4 packs at one time)

Pretty easy!  I gathered a couple of Michael’s plastic toys and a metal measuring spoon to put in the mold.  Next time I do this I might buy a couple of boxes and try making a couple differently shaped molds.  Another idea is to add food coloring to the gelatin.  No explanation needed…here are the photos!

The first thing he did was poke his finger in.

Patting it was fun.

How does it taste?

Making Progress!

I started piling crumbled gelatin onto his foot and he thought it was hillarious!

I think I might try this with older kids but maybe do something like blindfold them and not tell them whats in it or if you have older and younger you could include the older ones in making the gelatin and hiding younger kids toys in it.  Another messy project that would have been easier to deal with outside, but to me fun is always worth the mess!

Michael and the Oobleck

Standard

It was about a year ago that I first stumbled upon The Ooey Gooey Lady.  Her website and facebook page are a constant stream of inspiration and ideas.  Here is a blurb from her website.

Ooey Gooey, Inc. is dedicated to the creation of child-centered, hands-on, play-based environments for young children and provides workshops, training, technical support and curriculum resources to those who wish the same. Lisa Murphy, BS, early childhood specialist, author, founder & CEO, is available for both domestic and international conferences and seminars. Ooey Gooey Inc. is headquartered in Rochester, NY.

Please spend some time browsing her website!  I have found her ‘Resources’ page phenomenal!  These resources have been the springboard for many of the things I’ve done with kids.  Check it out!

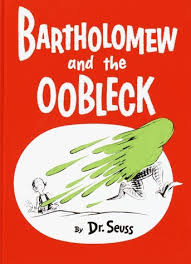
Of course, I can’t talk continue until I’ve also given props to the wonderful Dr. Seuss book where Oobleck actually falls from the sky and is introduced as an ultimately unwelcome form of precipitation.  This story falls into the be-careful-what-you-wish-for category.

Michael is almost 16 months old and I wanted to do a couple of sensory activities with him while I had the chance.  Oobleck is especially wonderful because it is entirely about the process and not at all about creating any sort of product.  From start to finish, not including the sizable amount of time I spent cleaning up, we spend about 1 hour lost in discovery and play.  60 minutes is quite a long time for a toddler to do any one thing, which allows me to count this as a success.

20+ pictures and nearly an entire roll of paper towel later, this is our story…

Once upon a time, Michael was walking through the kitchen and stumbled upon a container of intriguing objects.  One box of cornstarch, one sippy cup of water, measuring spoons and cups and food coloring.  Hmm…he wondered what it could be for and began clanging the spoons and drinking the water 🙂

With just a little nudging from the camera obsessed but loving Nanny, Michael discovered the texture of cornstarch.  Powdery, a bit chunky, firm, silky…fun!  Michael squeezed it and scrunched it, dropped it and pushed it around.  Interesting…but what else could he do with it, he wondered.

Again Nanny stepped in and helped Michael add the water.  Hmm…interesting…and then came the food coloring!  Michael was enamored by the swirls of color and insisted on more to create his masterpiece.

Ahh- much better!  Michael tried to pick up the colors and that didn’t work.  He slowly and carefully moved his fingers through the streaks of color when the brilliant idea struck.  I must taste it!  he though.  And with one swift lift of his hand the exploration continued.

Yuck!  Michael couldn’t believe that his beautiful masterpiece was so very distasteful!  He unsuccessfully tried to wipe his tongue off with, yes, his Oobleck covered hand.  The Oobleck water sippy cup saves the day.  Michael wonders what else this tub of goo might be good for.

A stroke of genius hits him and he quickly gets to his feet, grabs hold of the container and watches it cascade down into a puddle on the floor!  Intriguing!  It doesn’t splatter or splash, it barely spreads.  The chunks that the container seemed to have at the bottom had all quickly liquified and chased after the hard wood.  Michael finds the feeling on his toes delightful and definitely worthy of further discovery.

Sticky, slippery, gooey, silky, wet, cold, solid but liquid–this stuff is strange indeed!

At first touch its almost a solid but the heat from Michael’s hand quickly melts the Oobleck and he is able to move it around- but never pick it up!

Michael and Nanny spend quite a bit of time pushing it around and trying to pick up the strange stuff.

By the end, Nanny and Michael were nearly covered- which simply dried and felt silky on their hands but turned to liquid rather quickly!  A fabulous time was had but all (until Michael slipped in it as on a banana peel and ended up on his back in the stuff.  Hair covered, clothes covered, camera covered, floor covered: worth it.  So if you ever happen upon a box of cornstarch and some water, you’ll know what to do!  Enjoy!

*No wood was harmed or damaged in the making of this post 🙂

Discipline without Words

Standard

Yesterday was more of a challenge for me as I was tested by sweet Romy.  I’m not completely sure how much she can hear when wearing her hearing aids but I always talk anyway while using my limited signing abilities.  The morning was going great.  It only took me 4 guesses to pull down the game she wanted to play.  If you’re ever wondering what the sign for cherry is, here you go:

Cherry: Make a flat-O hand shape with one hand and extend the index finger of the other hand. Now gently twist your flat-O hand on the tip of the opposite index finger as if you were twisting the stem off the cherry.

She didn’t want to actually play High-Ho Cherry-O.  But the cherries were fun to play with, push around, pick up, put in and pull out of the buckets, etc….  After about 15 minutes of playing around with the little plastic cherries, she went over to the bin labled “Mr. Potato Head/Elmo.”   Check out this super organized play room!  Each bin is labeled and actually contains what it is supposed to!  the kids are under strict orders to only have one bin out at a time.

OK, so in order to maintain this level of organization, we needed to put the cherries away.  I began to pick up and signed for her to help me.

Help: Close your right hand and place it on the palm of your left hand in front of you. Then, lift both hands up together.

In true 4-year-old fashion, she crossed her arms, tucked in her chin and scowled at me, breaking the stare only to look at the bin she wanted and back at me.  Not knowing all of the signs, I nodded my head no and told her she needed to help me first and then we could play with the bin.  Nothing.  I sign what I can and repeat the sentence.  …  Nothing.  OK.  Has she heard me?

Am I communicating clearly enough to move on to consequences?  Its a little tricky.  But I gather from her attitude and knowing that she knows what it means when I pick up toys and sign for her to help.

So I tell her she can *help or *time out (signified by pointing to my arm where a watch should be and raising the pointing hand to an O shape.  I repeat a couple of times, looking at her…still nothing…and then count.  On my fingers of course.

1…2…3…ok.  *time out I sign.  She sits down.

Hmm…Surely she knows what is going on and understands exactly what she is doing.  I walk from the play room toward the time out spot and point.  Then I sign *time out again.  Nothing.

Time to pick her up and put her in time out.  I get her to the spot and walk away and then the fit begins.  Now, with a hearing child, at four years old I have a very clear picture of how to handle this situation.  Not so much when the majority of my signs at this point are food items!

We did eventually resolve it, she calmed down, we picked up the cherries, we played with Mr. Potato Head.  I spoke of it briefly with Romy’s Mom and she assured me I did great.

These moments are a struggle for me.  Not just because I am not proficient in ASL.  Even if I knew it all, how do I really know how much she understands?  She is a very sweet kid but definitely seems to be used to getting her way and not sharing and I wonder how much of her behavior has been allowed because of the communication challenge.

This is a much longer post that I intended it to be, but imagine it.  How would you discipline a child without talking?  With such limited communication?  I don’t want to just know enough sign to get by, and I don’t want Romy to know enough just to get by.  I want her and I to be able to thrive!  At four years old, most little girls I know are chatter boxes!  It saddens me that she is missing out on this both relationally and otherwise.  Just as she would have learned to speak hundreds of words by now, shouldn’t she be able to speak hundreds of signs?  Maybe she can?  This is such a new world for me and I am loving the challenge 🙂

A Day of Signs

Standard

Today was my first 5 hours alone with a 4 year old deaf girl named Romy 🙂  She’s really sweet and adorable and all in all we had a good day together!  Mostly for my sake (but just in case your curious 🙂 here are the signs I learned today- through lots of guessing to figure out what she was trying to communicate.  Hopefully I won’t forget these while I’m in Ohio!

A lot of signs make so much sense- but some of these…not so much.

Cracker: Cross one arm over your chest, make a fist with your opposite hand, and use the fist to tap the elbow of the crossed arm.

The sign for water: Make a W with your 3 middle fingers, touch your chin twice.

Frog: hold closed fist under chin, flick fingers out quickly as the legs of a frog when leaping

To sign potty, make your hand into a fist with thumb peeking out between the index finger and the middle finger. Hold the fist out and shake it around a little.

Cheese: Place your palms together, fingers touching opposite wrists, and then rub the heels of your palms together.

These were the basics of today 🙂  I also leaned ‘fast’ because who wants to be pushed on a swing any other way!  And her own personal sign for Caillou, her favorite cartoon.  Lots more to come, I’m sure!  I have to say, the most difficult part of my day was having her tap her elbow over and over again off and on for 15 minutes while I tried to guess that all this frustrated little girl wanted was a cracker!  A few other signs that she used frequently today were Mommy, please, thank you, more, candy and sticker.

Minute to Win it Games with Leah!! (LOTS OF PICTURES!)

Standard

Leah and I had so much fun yesterday and I couldn’t wait to share some photos of the event!!!  I’ve been spending so little time with kids lately that I’ve had little inspiration for this blog, so I’m really excited to share my latest!  And I am watching Leah for 3 days this week so there is sure to more coming!  WooHoo!  Anyway- First step, I completely cleared out our kitchen floor- moved table, chairs, trash can, and rugs and gathered all of our props.   

Each game was worth 10 points if accomplished in one minute, 5 points if accomplished but in more than one minute.  I typed up a simple goal thermometer for Leah to color in as we earned points.  It had marked points with different prizes and a list of the games for her to choose the order from.

I didn’t get photos of all of our games- especially the ones we did as a team, which is sad because these were our favorites by far!  So I decided to share the Blue Prints of those games instead 🙂

Iron Board Man

Ready Spaghetti

This is the first game I took pictures of- its called Stick To It- one player bounces ping pong balls to the other that they catch with lint rollers- 3 balls must be caught on each roller in one minute to win it!

Apparently we were both too excited to hold the camera still 😉

This next game is called Candy Elevator and Leah fount it very challenging.  I just didn’t like the burning rope feeling on the backs of my ears!  Tie string around two pencils. Loop string around your ears and pull down to lift 3 candies on pencils up into your mouth.  Leah was a great sport about it.

Get Forked was one of those games I’d heard about before.  I knew it would be really hard for both of us, so we bent the rules a bit and Leah and I were allowed to start a bit closer to the 2 forks (supposed to be only one…but it was hard!).  In all honesty, I’m not completely sure that made it easier!  After about 15 minutes of rotating 1 minute of throwing quarters at these two blasted forks we both managed to land quarters in the right spots 🙂

This one was much easier than I expected!  Pass a tic-tac through a space in a balanced tennis racquet into a cup.  Leah made it in her first minute!

Yikes this one was hard!  And frustrating!  But we were determined to get our full 10 points so we pressed on and finally (after some rule breaking of shifting erasers closer to center) the marble stayed on track!  Oh…the track is made of sections of staples pointy side up!

Goal:  Stack 5 (ok…rules say 6 but 5 was what I had) dice on a Popsicle stick in your mouth and hold for 3 seconds.  Took about 10 tries but she did it!

Blow Ball:  Fill a pizza pan with ping pong balls (it stated out with about 50 balls on it) and blow off all but the 3 marked ones.  Leah made it in literally 59 seconds- 1 second to spare!  I particularly loved the dogs going crazy over the balls as they fell from the pan 🙂

Flip Your Lid.  Leah was a pro at this one.  It took her about 5 tries and 30 seconds to flip a cup onto the bottle.  Amazing!

This was Card Ninja.  Throw a card into a watermelon so it sticks for 3 seconds.

It took  nearly the whole deck but she did it!  Way more challenging than I thought to get a card to fly straight!

Leah earned 145 points which earned her a trip to Pirate’s Cove (water park) in Denver on Thursday!!!  Can’t wait!!!  Pictures sure to follow 🙂

Beware:  If I watch your kids anytime in the near future, there is a GOOD chance I will try to incorporate some of these super fun games!

Look at THIS!!!!

Standard

I ran across this page with some really fun ideas and had to share!  I haven’t tried any of them yet but I plan to in a couple of weeks while I’m hanging out with Leah 🙂  Take a peak!  Enjoy!

I love the crayon idea, silhouette painting and so many more!  Please share if you try any of them!